FAQ, Downloads Help In Progress, Version History, Feedback, Forum
Glossary:
An "Item" is any single unit in a Rose document. A rectangle or a shape, it usually has text, it may have an icon or a picture. It could also reference a full path, alias or url. May be invisible and/or locked.
Item "Title" vs. item "Content": The Title is the words you see when the Item is displayed. It is akin to the name that goes next to the icon (for a file). The Content is the hidden, explanatory information, or linked URL. For example you could make an item who's title is "Venus" and who's content's are "Goddess of Love". Another example could be to make an item who's title is "Yahoo" and who's contents are "http://www.yahoo.com/", in this case, Rose will launch the URL when you click it in Go Mode. You have the option of Generating the contents as well as the title. If an item is an alias to a file on your local file system, the "Content" is the alias itself, not the file. If the Title refers to a graphic image, the Item will display as that image, rather than the name of that image.
A "Rose Document" manages lists of Items, viewed in columns or in freeform mode.
"Generating", "To Generate", that is, to accumulate information into a new document, to copy information from different places to a single place. The notion here is that you are generating a new document by pointing into other documents to the things you want to be in the new document. Only a Rose document can be a Generator.
The "Target" of generating will be the destination of the items that are copied when you click them. This could be a Text document or another Rose document. The target stays the same even if you use many different Rose documents to generate from.
"Go Mode", that is, the mode you are in when you are viewing a Rose document, and you are going to be "Generating" a new document by clicking on the items that you want to go to the new document. In "Go Mode" you are using the Rose document, this is in contrast to "Edit Mode", in which you are composing the Rose document.
Standard Macisms:
• 'Shift' or 'Command' click or arrow keys: To Extend/Toggle selection
• option-drag to duplicate (copy) the selection (you can option drag to another window to copy the selection there)
Secret things:
• In any dialog, You can press the first letter of any button to click that button
• If you have set an item as Background, then when you go to "Go" mode, that item will be used as the bounds of the window. In that case, you should make sure that all other items are within the bounds of that item, and also ensure that the item is flush top left. An example is the Zyriya board, where the picture is the graphic behind all the buttons. Typically, you would import a picture, align it with the top left of the screen, "Size To Fit" it, then "Set As Background" it.
Secret things in Edit Mode:
• Context menu (right click) with cut, copy, paste & font
• Arrow Keys will nudge the selection when not in column mode. Hold option to nudge by 10.
[Enter] or [Return] will begin editing the text of an item (if there is only 1 selected)
Procedures:
To open a different file format in Rose format (for example to open a text file as a rose file):
1) Create a New Rose document
2) File->Import->[pick the format]
To Hide/Lock an item
1) Select the item you want to hide/lock
2) choose Hide/Lock from the Format menu
To Unhide/Unlock and item:
1) Choose Format->Ignore Hidden/Locked
2) Select the item you want to Unhide/Unlock
3) Choose Format->Hide/Lock
4) Choose Format->Ignore Hidden/Locked (to set it back to what it was before)
To link a file or folder: drag it from the OS browser onto an item
To link a URL: drag it from your web browser onto an item, or drag a URL file from the OS browser. Or simply right-click on the item and choose "Edit Content", or use the hollow arrow to click the item. This lets you edit the Content, (see glossary) to type your URL directly into your Item.
To link an email: go to your web browser and type your address. Don't press return, but now drag it onto an item in the Rose window. The address is formatted like this "mailto:me@davecotter.com", or like this: "mailto:me@davecotter.com?subject=Hey There!" Alternately right click on the item and choose "Edit Content" or use the hollow arrow.
To Create a picture button
Drag it in from the OS, or File->Import->PICT or BMP
Things to try:
• new rose
• view as freeform
• switch to finder
• drag an image file to rose (pdf, png, jpg, gif, watever)
->item is made with image, and links to image in file system. item thumbnail/icon is image ("title" of item), like a graphic button, will launch link if you click it ("contents" of item). • drag a volume/folder/file/alias onto rose
->item is made in rose with link (both title and contents are set, ie: it'll launch the link)
• switch to web
• drag URL to rose
->item is made in rose with link
• drag from finder or web to existing link in rose
->link updates to point to new destination, but original button name/image is kept
Tool Palette (not enabled yet, due to "issues" on Windows)
The First 4 are Tools: (ie: When you select one, the others un-select, and the tool changes what a click in a Rose document means)
Arrow Tool: Click in an empty area to create a new rectangle shape item. Also, use to select, drag, resize or rename an item or it's contents.
Hand Tool: Pan your document around, only works when there are scroll bars.
Shape Tool: Works only in Edit Mode, when you want to draw an oddly shaped button (instead of a rectangle), check this item. Then, to draw an odd shape, click and drag a bit to set the first point (if you click and let go, no shape is created). After that, just click to add new points to your poly-line. You get 8 points to use. To finish a shape earlier than 8 points, click on the first point.
Marquee Tool: To select all items within the rectangle region
The following 6 are command buttons: (ie: they do the same thing the menu item does)
Insert Item: See below under "Layout Menu".
Insert Carriage Return: See below under "Layout Menu".
Add Numerology Summation: See below under "Layout Menu".
Add Numerology Reduction: See below under "Layout Menu".
Generate Selection: See below under "Layout Menu".
The following 2 are command+state buttons: (ie: they do the same thing the menu item does, and also reflect the state of the current selection)
Locked: See below under "Layout Menu"
Hidden: See below under "Layout Menu".

New Rose: Creates a new Untitled Rose document
New Text: Creates a new Untitled Text document
Open: Opens Rose or Text files
Import: imports other file types into the current (frontmost) rose document
Export: exports the current document (rose or text) in the specified format
Close/Save/Page Setup/Print do the obvious
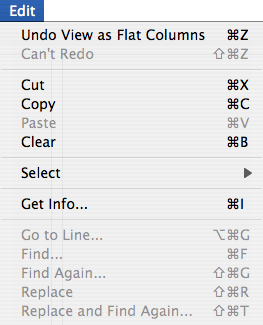
Undo and Redo have stacks, so you can go back (or forth) multiple steps
Cut/Copy/Paste/Clear: Do the obvious.
Select > leads to a submenu of the kinds of things you can select. An interesting one is "Select Missing" which selects all those items who's links are broken, so you know which ones you need to fix.
Go To Line/Find/Replace etc only work in Text windows (for now), and do the obvious.

View As: Lets you change how you're viewing the current document, these are like "lenses".
View As Icons: Like the Finder/Explorer by same name
View As List: Like the Finder/Explorer by same name, you can use "twirly arrows" to disclose heirarchic information, and see details about each item in columns.
View As Freeform: Is like "page layout" mode, you can place anything anywhere.
View As Flat Columns: This will automatically lay out your Rose document in a "column mode". You can add or remove columns with the "-" and "=" keys. Note you will NOT be able to manually place or size your buttons. You can however, re-arrange their order by drag and drop. Note this will also remove any shapes and un-hide any hidden items.
Clean Up: Will clean up the view when viewing as Freeform or Icon.
Sort Ascending: Not checked means "Sort Descending", it just reverses sort order.
Sort: Will sort the view according to what you pick
Show Hidden: See "Hidden" below. When you want to see / select / operate on hidden items, you must show hidden.
Ignore Locks: See "Locked" below. When you want to select / operate on a locked item, you must ignore locks.
Show Toolbar: Shows, at the top, the toolbar, including Back (Undo), Forward (Redo) and the "View As" icons. Also shows the info bar and the path bar.
Show Status Bar: Shows, at the bottom, the status bar, which shows rollover and selection information.
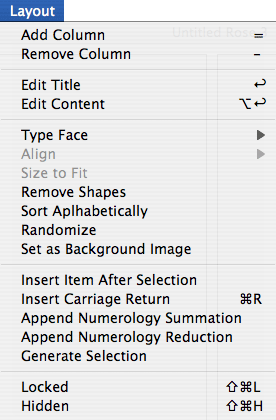
Add/Remove Column: Only available when in "View As Flat Columns" mode, adds or removes a column. Right?
Edit Title: Edit the name or the source of an item
Edit Content: Edit the explaination or the destination link of an item
Type Face/Font: In a Rose window, allows you to set the font characteristics of the selection. In a text windw, sets the characteristics for all text in every text window. (Presently, text files are pure text. When I move to RTF as the default text format, you will be allowed multiple font style runs within a single text document.
Align > Align the selection to top / left / bottom / right
Siz
Size to Fit: In a Rose window, re-sizes the rectangle around each selected item for best fit
Remove Shapes: Removes custom shaped buttons, and reverts them back to rectangles, operates on the selection.
Sort Alphabetically: This will sort your rose items.You will only get visual feedback if you are in Auto Layout mode.
Randomize: This will randomize the order of your rose items. You will only get visual feedback if you are in Auto Layout mode.
Set As Background Image: Designates an item (text or image) as a "background". You may designate more than one item as a background, but the first one (the one furthest back) has special meaning. This one MUST be flush top left (ie: it's top left coordinates are (0, 0), and ALL other items on the page MUST fall within it's boundaries. A background item cannot be selected (it is locked), and is drawn before all other items. A background image can not be clicked in Go mode, and will not generate anything.
Insert Item After Selection: In Flat Column Mode, this will insert an empty item ready to be named. It is inserted after the selection, or at the end if no selection.
Insert Carriage Return: In Flat Column Mode, this will insert an item with just a carriage return. It is inserted before the selection, or at the end if no selection.
Add Numerology Summation: In Edit Mode, adds the numerology of the selection and creates a new item with that value, appended to the end. Only works in Rose documents.
Add Numerology Reduction: In Edit Mode, this Numerologically reduces the selected item, adding a new item with that value, appended to the end. Only works in Rose documents.
Generate Selection: Only in "Edit" mode, copies the entire selection to your Generator target
Locked: When an item is locked, you can not click on it or otherwise operate on it. This prevents you from accidentally changing something you don't want changed.
Hidden: Buttons that are hidden are not visible and cannot be operated on. However, you *can* click them in Go mode, even tho they are invisible. See the Zyriya board for examples.

Go/Edit modes: To switch between editing your Rose document and having the links be "live"
Generate Text/Rose Document: Let's you choose what kind of document to generate when a new document would be created.
Generate Title: Generate the name of the item into the generator target.
Generate Conent: Generate the contents of the item into the generator target.
Generate Separate Lines: Only works when generating Text. When you click a button to add it to your text file, this will place new entries on their own line, rather than on the same line next to the previous entry.
Generate Speech: Reads each entry allowd as you click it. Set the voice in the Speech Prefs Pane.
Generate Image Launch: If you click an item that has an image as it's link, this will "launch" the link, ie: open it in your web browser or, if it is local, in whatever application would open it by default.
Generate Numerology: Generates the numerology of the text, rather than the text itself.
Speak Text File: Will speak an entire text file.
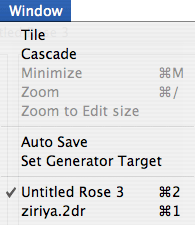
Auto Save: Will save your document automatically after any changes
Set Generator Target: This will set the target of any generating to the frontmost window. Note that it can be either a text document or a rose document. Yes, you can get recursive by generating from the target window, this isn't fully supported so it's ugly right now.
Everything © 2001, 2002, 2003, 2004 David M. Cotter, all rights reserved.